The little clip looks ready to share, but the attachment is too large for the place you want to send it. You do not need to overwrite your original or start generating again. Make a separate sharing copy, then check whether it is actually smaller and still worth watching.
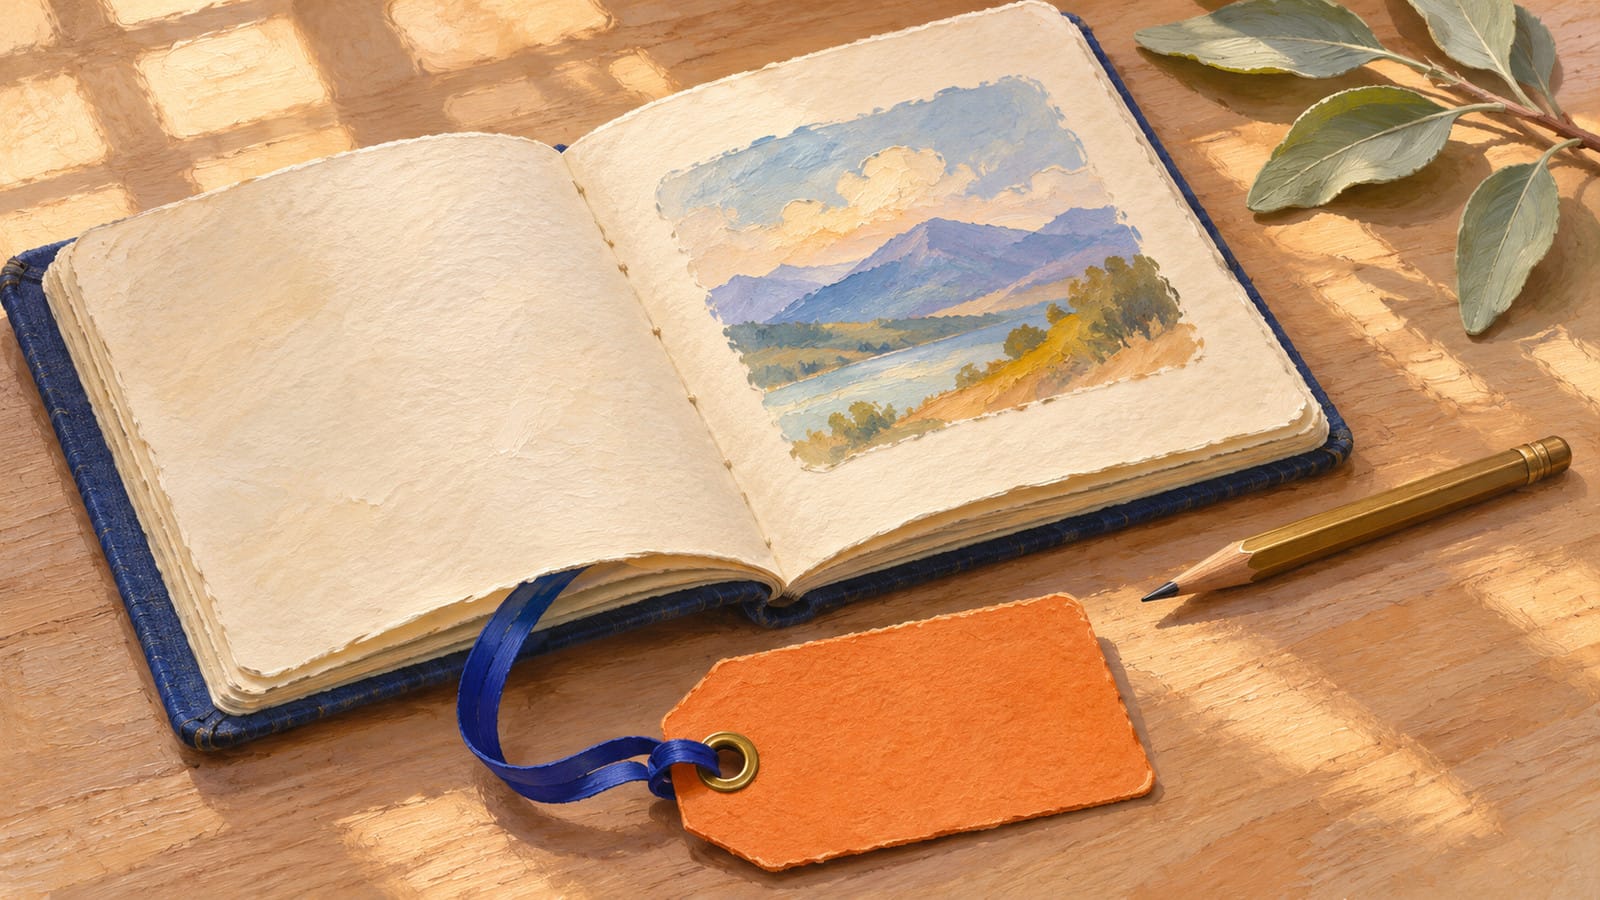
This free image-to-video walkthrough uses a fictional travel-journal illustration: an open notebook and a blank paper luggage tag making one small movement. The artwork is original AI illustration, prepared externally. No real trip, generated video or compression result is presented. The conversion steps apply only after you have an actual video file to open.
Keep the downloaded original
Start with the destination, not an invented universal file limit. Check the current attachment or upload guidance in the app or site you intend to use. It may care about file size, format or both. This article does not establish Publisha's native video-upload support or any channel's current limit.
If your original already fits and plays properly, you may not need another encode. Otherwise, keep it unchanged and save the new version under a different name, such as journal-sharing-copy. Retain the format extension created by your converter; changing a filename extension alone does not convert a video.
The original remains your fallback if a smaller version loses too much detail. You are preparing a delivery copy, not replacing the only version you have.
Original fictional travel-journal artwork, not a photograph of a real trip or a generated video. The tag, paper texture and page edges provide details to inspect in any later file.
Give the illustration one modest action
If you already have a downloaded clip you want to share, continue to the conversion section. If you are starting from artwork, prepare two compatible complete images first.
For this example, the notebook stays still while the blank tag moves slightly from its opening pose towards its planned ending. Keep its attachment, the page edges, light and camera consistent. A small move leaves less to invent than a tag spinning around or pages flipping through a whole journey.
The teaching pair was prepared with a referenced generative edit and a local external composite. The unchanged scene comes from the starting artwork; the edited tag area supplies the ending idea. These are illustration plans, not frames from a video or a physically tested hanging mechanism.
Prepared complete start and end scenes. A referenced generative tag edit was locally composited into the source artwork; these are static input plans, not a video result or a working physical mechanism. Upload the clean full scenes separately.
A complete motion prompt could be:
Fixed camera. Let the single blank terracotta paper luggage tag make one small gentle movement towards its position in the supplied ending image. Keep the tag continuously attached by its blue ribbon to the same notebook corner. Preserve the cream eyelet, paper texture and tag shape. Keep the notebook, pages, desk, pencil, background and lighting still. No new writing, routes, names, extra tags, page turns, camera movement or added objects.
Use your own original or permitted scene and adjust the object descriptions to match it. The prompt requests continuity; it does not enforce a region lock or prove that the movement will work.
Generate and inspect a real candidate first
The HeyDream free image-to-video tool is one option for attempting that transition.
Upload the complete opening scene to Start Frame and the complete planned ending to End Frame. Both images are required, separately; the two-panel comparison is not one input. Choose 16:9 for this wide scene, paste the prompt and select Generate, completing any verification displayed. The page also lists 9:16 and 1:1.
The site describes a queue, previewing completed results with audio and downloading. Those are vendor-described functions, not results tested for this illustration. Its current free positioning does not guarantee permanent unlimited access or exact visual preservation.
If a candidate finishes, watch it before downloading a version to keep. Check the attachment and the notebook's shape, and listen to the audio. A file-size reduction cannot repair an invented page turn or a tag that changes into another object.
Open the actual file in HandBrake
HandBrake is a separate free, open-source desktop video converter. Compression here is external work, not a HeyDream or Publisha control. This walkthrough has not installed it or encoded a demonstration file.
Once you have a real downloaded video:
Select Open Source in HandBrake and choose that file.
Choose an official preset suitable for the intended playback destination. HandBrake's documentation suggests Fast 1080p30 as a general starting option, not a guaranteed small-file setting.
Inspect the proposed crop and dimensions. Keep the full intended composition and do not enlarge the picture beyond the source simply because a preset mentions 1080p. In the video frame-rate controls, choose Same as Source rather than deliberately increasing the frame rate.
Set a new Destination filename and location. Check that it differs from the original before encoding.
Use Preview, then Live Preview, to encode and inspect a test portion. If the balance looks useful, select Start to encode the sharing copy.
The controls can vary by operating system or version. Keep the goal simple: a new file that works for the destination, without unnecessary enlargement or a higher frame rate.
Reduce size carefully, then compare actual files
If the new file remains too large, make a small adjustment towards lower quality in HandBrake's video-quality control and preview again. Its official guidance explains that lower quality typically reduces size, while aggressive reductions can damage detail. Quality numbers differ between encoders, so one number is not a universal recipe.
Check the tag's paper grain, the ribbon edge and the notebook's thin lines. The crop below identifies details worth watching; it is a still-art reference, not a before-and-after compression test.
True crop of the original illustration for choosing detail checks. It does not show an encoded file, a HandBrake interface or measured before-and-after compression quality.
After encoding, compare the actual file sizes and open the actual sharing copy. Play it through, check those details at the intended viewing size, and confirm that audio and framing remain suitable. Already compact sources may not become smaller, and a preset does not promise a particular number of megabytes or percentage saving.
If the copy meets the destination's requirements and still looks acceptable, use it for manual sharing. If it does not, adjust and check again, or keep the original and choose another suitable sharing route. Keep the master either way. The useful result is a checked delivery file, not a smaller number at any cost.